Deconstructed Reconstructed Retreat – Saturday Collage

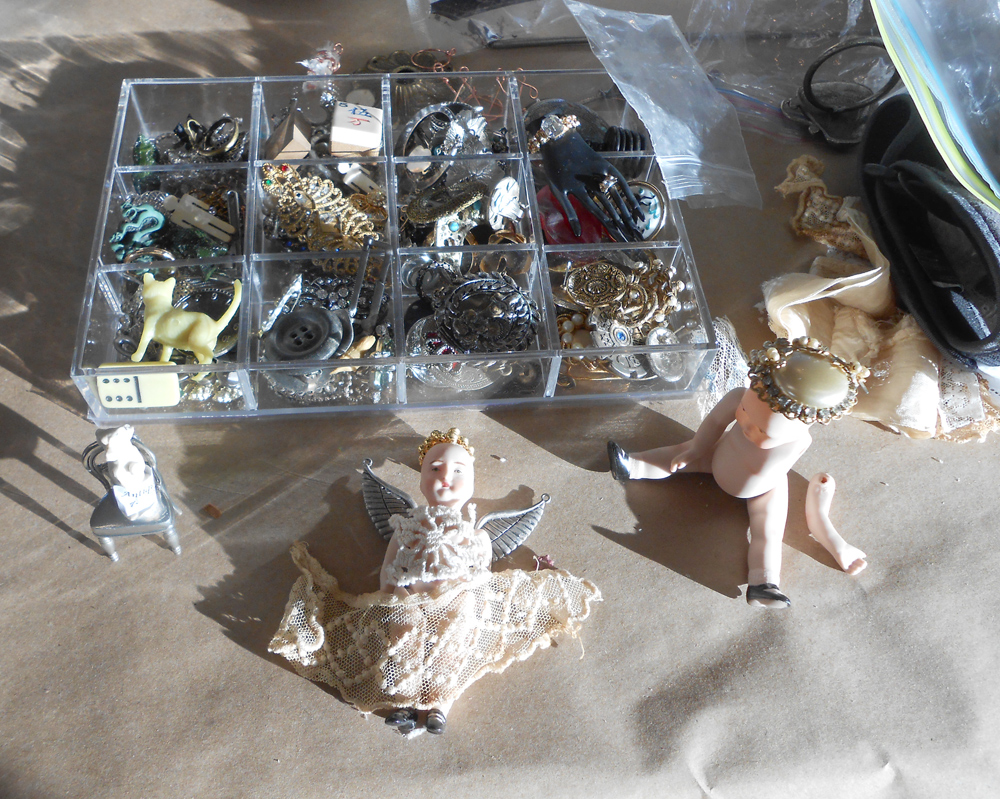
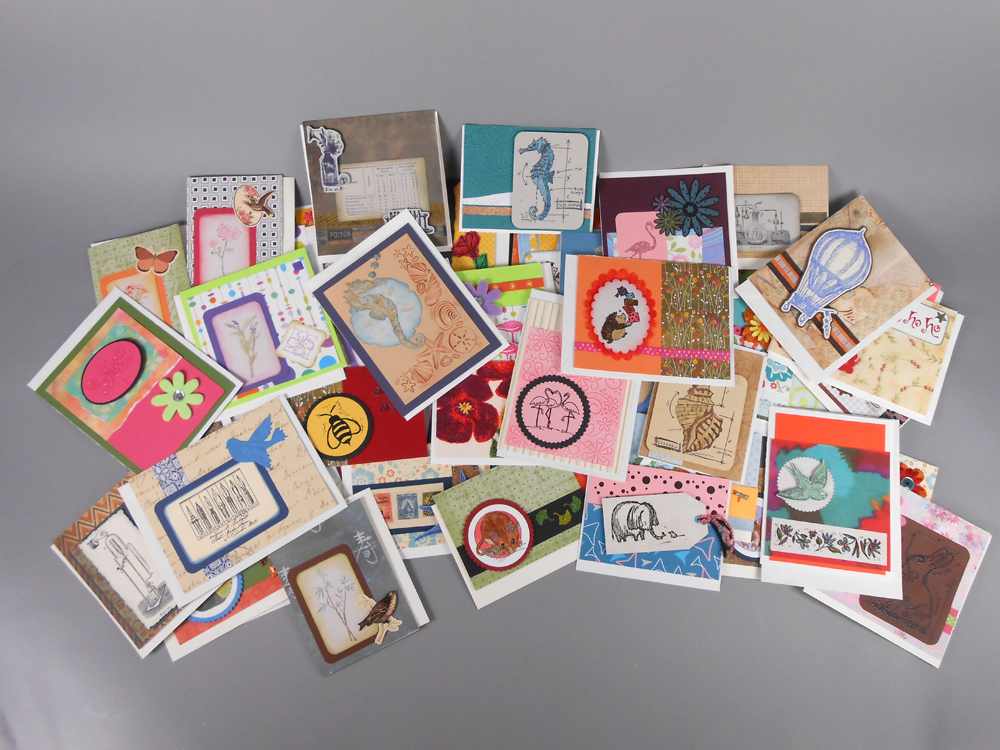
On Saturday, Jen took us through the process of creating a collage using photographs. We were asked bring some prints of our photos, or we could use one of hers. I brought some pictures taken on a trip to Florida where I visited Sea World and the Mote Marine Laboratory. Jen taught us a technique to remove the emulsion from the photograph and then add in some new color.

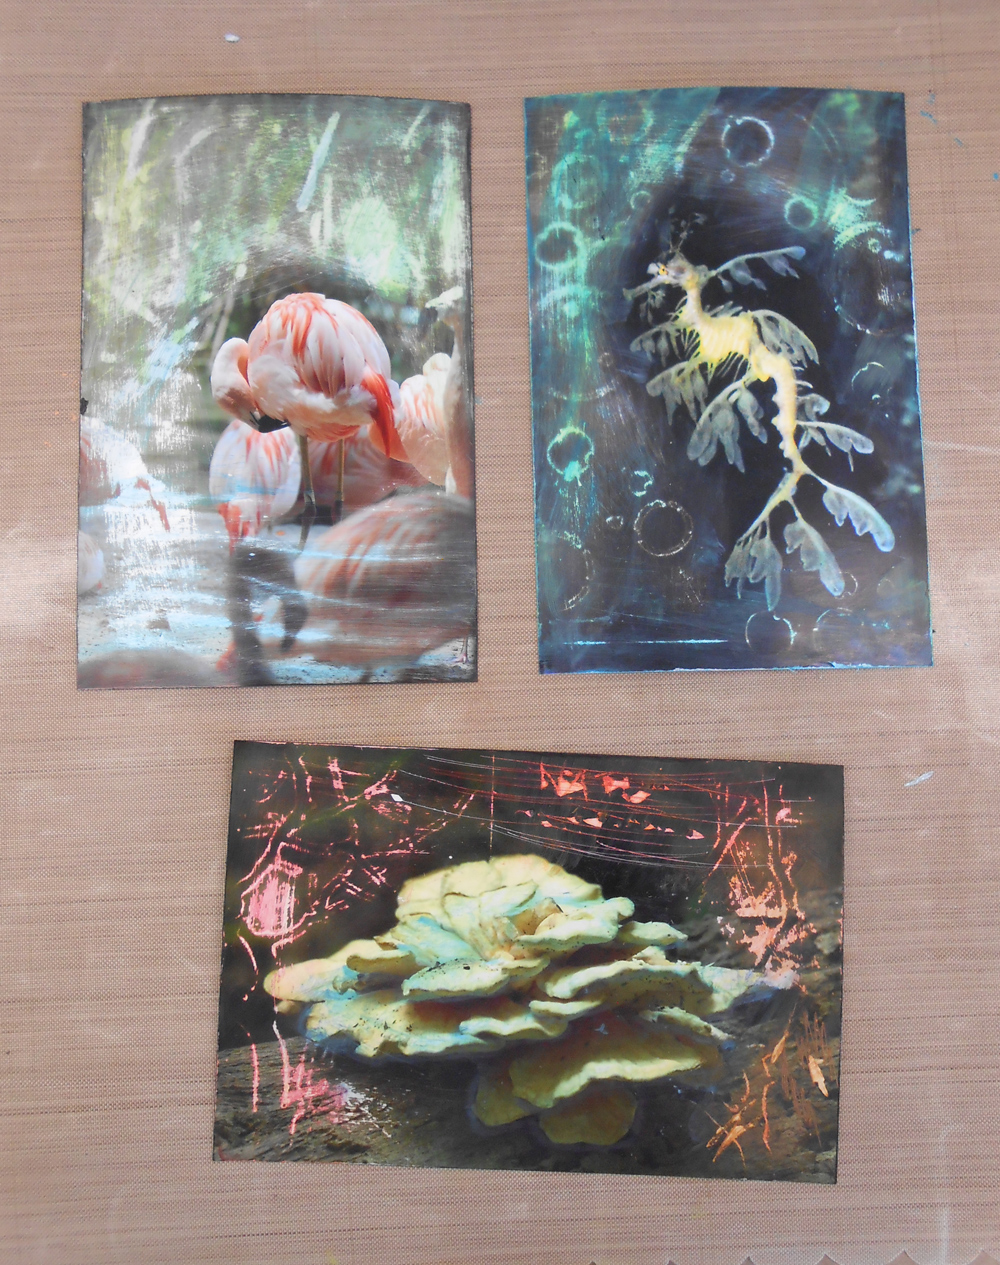
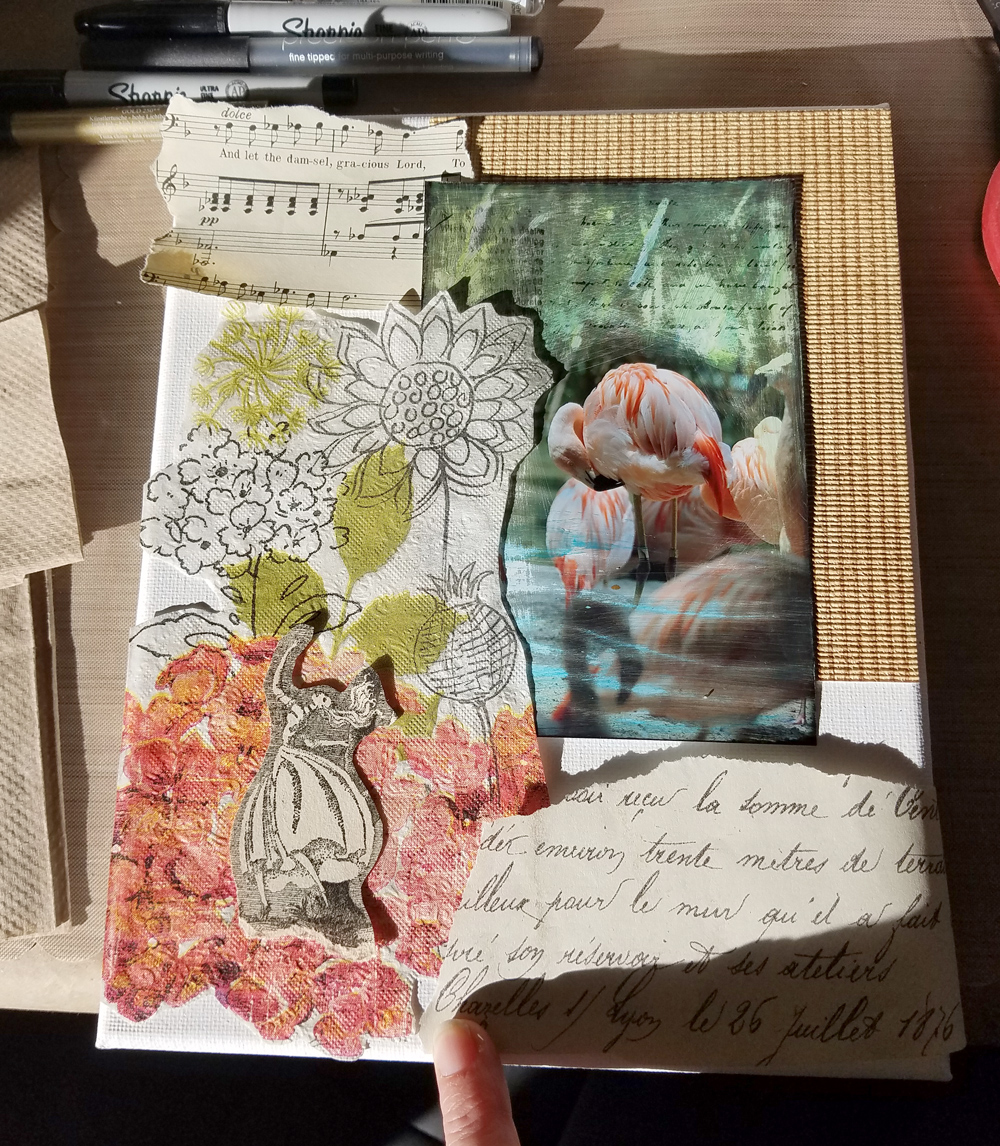
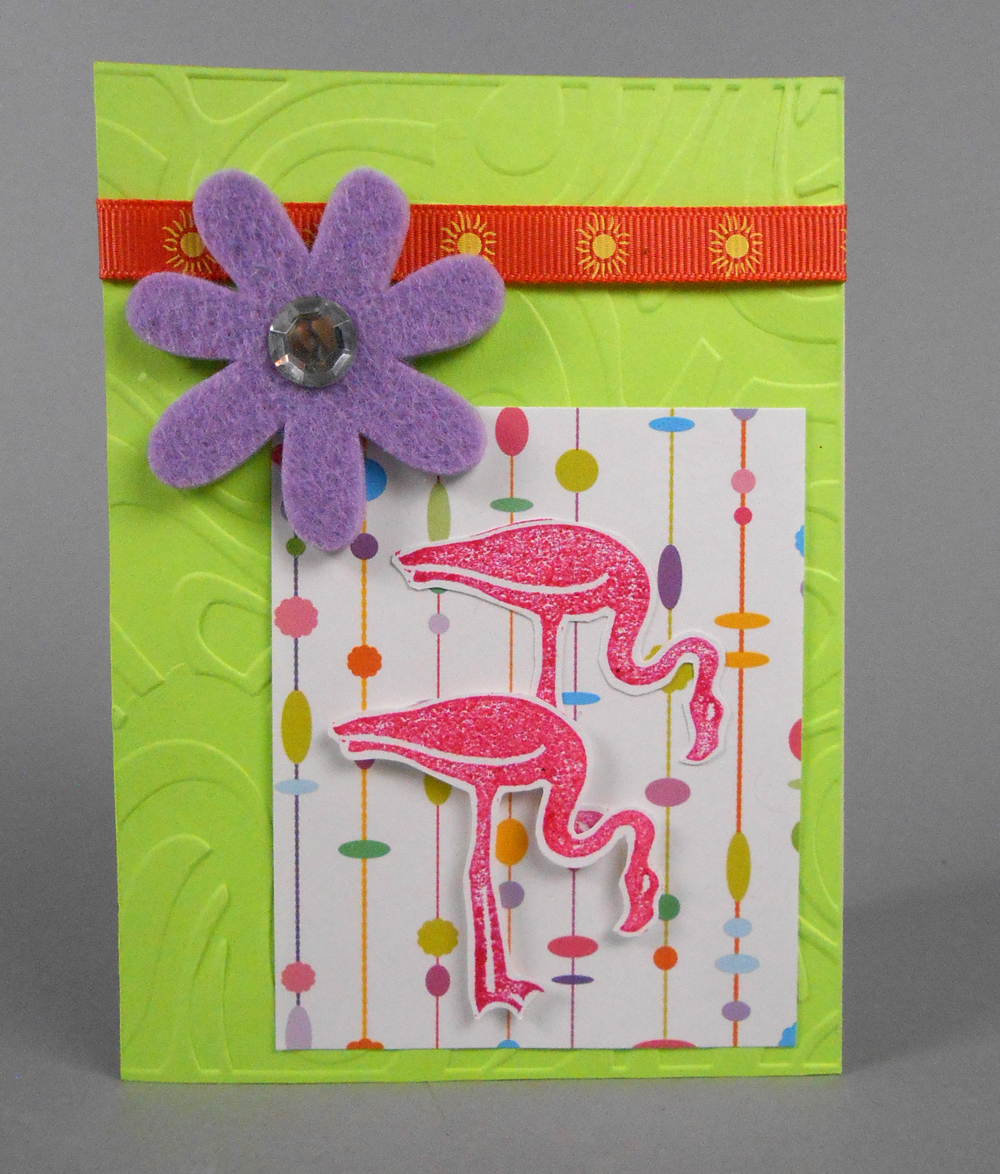
The one I chose to use for my collage was the flamingo – it wasn’t my favorite of my flamingo pictures, but I liked the way it turned out.

Jen provided us with a blank rectangular canvas and a large variety of papers. The collage began to take shape, with a wallpaper sample, some printed music, a floral napkin and some paper with French text. An illustration of a dancer from a vintage book was also chosen. The components were attached to the canvas with gel medium and layers of color and ink were applied.

I began to think about what I wanted to say with this piece, and I was reminded of how flamingos, although quite odd looking in some ways, are considered beautiful, elegant, and graceful. Words I never thought applied to me. But a large part of this retreat was about affirming who we were. I do have grace, elegance, charm and beauty and I will embrace those qualities in me.

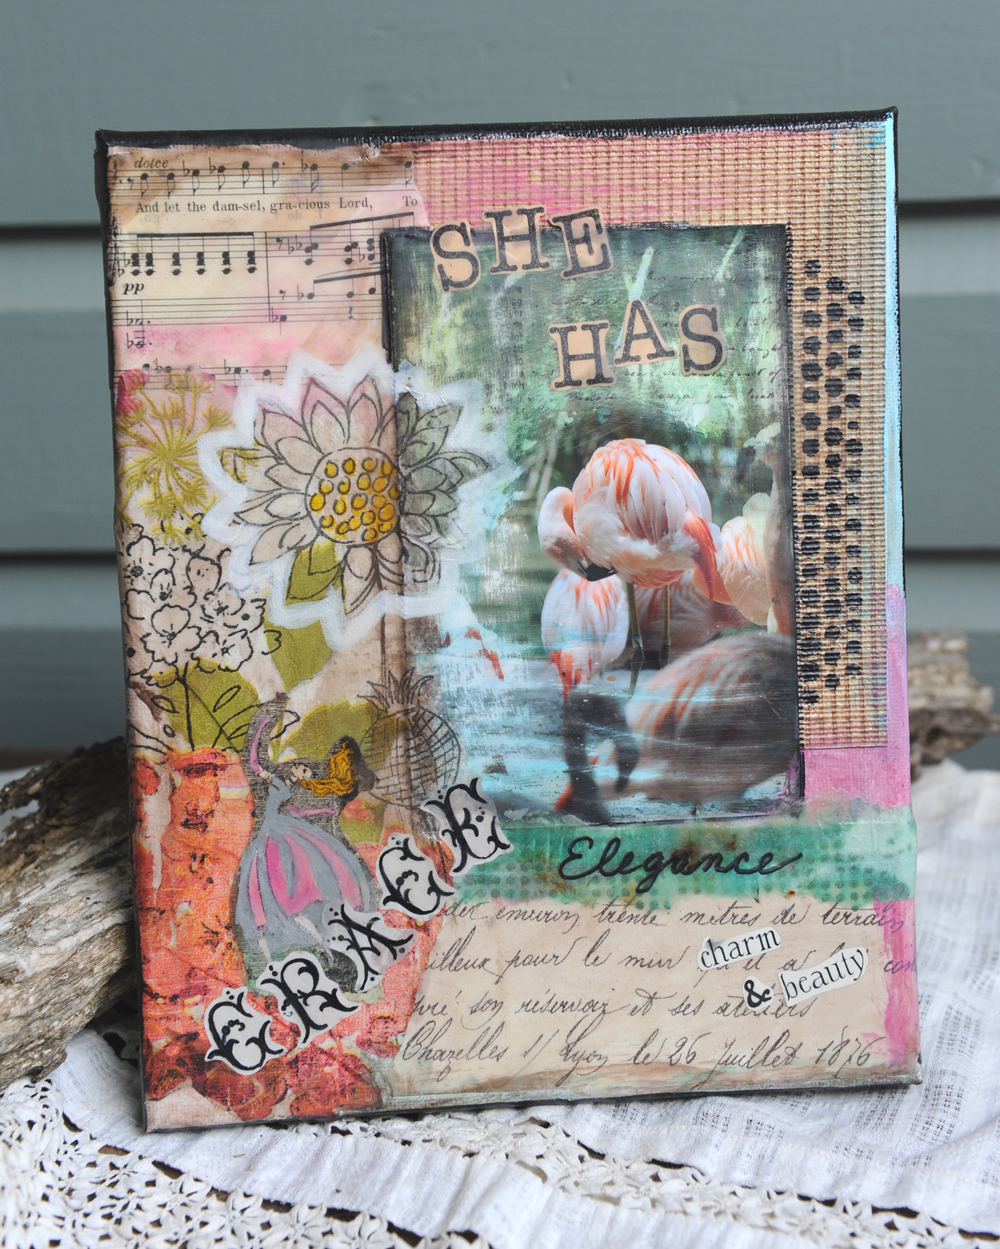
When we were finished with our collages, Jen showed us how to apply a coating of beeswax. Jen’s way of teaching this retreat – leading us through the process and teaching techniques, but having us chose the style and direction we want to take, was a new experience for me. I had to find my own artistic voice. It’s still a bit soft, but getting stronger all the time.

Posted in Uncategorized | Leave a comment

Deconstructed Reconstructed Retreat Friday – Part 2

I worked on two other necklaces on Friday, although neither was finished that day. The first one started with an old ampere meter, a lizard brooch, (both of which came from a stash Jen brought to share) and a tassel provided by Jen. I was able to pry the back of the meter off, which allowed me to punch holes at the top and bottom. I used wire and beads to hang the tassel from the bottom of the meter. I removed the pin back from the brooch and attached the lizard to the meter with apoxy sculpt.

I brought another beaded link out of the top of the meter, with a faceted opalescent crystal and a green square bead. My upper component was a hinged metal piece to which I attached a wooden block with the letter “e”.

In order to attach this to the beaded link on the meter, I shaped a piece of copper wire to thread through the hinge, curled the ends, then place a paddle ended copper wire through the curled ends. Jen calls this a trapeze connection. It worked perfectly.

To finish, I created a messy copper wire bail around the top of the upper component and strung it from a black leather cord. I finished the ends with a spiral link and a hammered hook.

My third necklace began with a piece of driftwood, a smashed penny, a resin piece “speak”, a metal moon (deconstructed jewelry part) and an owl button. I began by drilling holes in either side of the driftwood. I drew a bead on the end of two pieces of bronze wire, then attached them to the driftwood with beads and finished with wrapped loops. I used metal stamps to impress the word “softly” onto the smooth side of the smashed penny.

I added some fiber beads and some crystal beads as I linked parts together. I didn’t like the silver color of the moon, so I changed it using gilder’s paste.

The owl button was the wrong color and I wanted to make more owls, so I made a mold of the button. When the mold was ready, I poured in some resin. That had to cure overnight. The next morning I painted the owl with black acrylic and highlighted with gilder’s paste. I do love that product.

I finished the necklace with more torn silk fibers and a hammered wire clasp.

Both of these are fun to wear. I could have spent all my time making jewelry, but Jen had collage and assemblage to teach us too. So much more to come.

Posted in Uncategorized | Leave a comment

Deconstructed Reconstructed Retreat – Friday part 1

Friday at the retreat was all about jewelry.  We learned how to take apart commercially made pieces, use found objects and all about making connections. Using Apoxie Sculpt, torching copper and bronze wire, and drilling holes in objects were all covered.  I began my first piece by pulling out a jointed china doll and a winged heart pendant.


I laid the doll on top of the pendant and liked the look of the wings.  I also found a rhinestone piece – not sure what it was originally but made an awesome crown.  Now how to attach these to the doll?  Drilling holes in the china would likely cause it to shatter, so Jen suggested Apoxie Sculpt. This clay epoxy material hardens in a few hours – no need to fire or bake. And it will attach most materials. My biggest problem was waiting for it to harden – I wanted to move on to the next step.


Here you can see the back of the doll.  I cut the wings away from the central heart of the pendant and used the Apoxie Sculpt to attach them. It looks kind of ugly, but I knew I would be adding color on top of the clay and that it would not show when the piece was worn.

I used Ice Resin to attach some vintage lace and the heart part of the pendant to the front of the doll. I also used it to attach a piece of vintage rhinestone cup chain around the base of the crown to hide the clay.

Gilder’s paste was used to color the wings, heart and crown.

A mottled blue silk scarf was torn into a thin strip and I used bronze wire with balled ends to attach the silk to the wings.

I used more bronze wire to create a clasp for the piece and attach it to the silk.  I was happy with how this piece turned out but even more pleased that it was desired by both Jen and Patti Euler of The Queen’s Ink. Since I didn’t want to hurt feelings by giving it to one over the other, and I am very quick to donate pieces to raise funds for charity, I asked Elena if we could sell it by auction and donate the funds to her organization – Charity Wings. Well, we could and we did – the auction was won by Patti.

The proud creator – Elizabeth (me), the wonderful new owner – Patti Euler, the amazing charity worker – Elena Lai Etcheverry, and the awesome friend – Doreen Reynolds.

Posted in classes, ice resin, recycled creations | Tagged , , , , , , | 1 Comment

Deconstructed Reconstructed Retreat – Thursday

At the end of January, I had the privilege of attending the first Deconstructed Reconstructed art retreat led by Jen Cushman. Jen is one of my all time favorite teachers and this was a new concept. Rather than a class or workshop, where you recreated her project, Jen would lead us through the process of creating our own artwork and telling our story through it.

Our first task was shopping. Yes, really.  We went into old town Temecula, CA to scope out some of the antique stores.  These are the treasures I found – some wooden clock gears, a tin cookie cutter, a metal funnel for filling lanterns, a wooden thing-a-ma-jig (still don’t know what it is, a metal fan sprayer attachment for a hose, a wooden box, a few antique pictures, and a miniature rolling pin. And those tiny things in the center you can’t really see are miniature copper pots (dollhouse size).

I did begin to put a few of these together – the funnel and one of the clock gears. I added a tiny chair place card holder I had brought from home (we were asked to bring some of our own things to use) and an antique china dog purchased from one of the other attendees.  This one is still a work in progress, as yet unfinished.

So Thursday ended with new treasures to inspire me, new friends to encourage me, and new ideas keeping me from falling asleep easily.  Next post – Friday and jewelry!

Elizabeth

Posted in classes | Tagged , , , | Leave a comment

Stampin Up Love You Lots

Love You Lots is a Stampin Up set available only as a hostess gift.  Worth hosting a party to get this set, if you ask me.  So cute with the animals and sayings.  Here are the four cards I made with this set.

The adorable hedgehogs simply embossed onto brown cardstock and cut with Spellbinders nesting rectangles.
Ladybugs in love embossed in black on red cardstock.. Cut with Stampin Up scalloped nesting circles.

Elephant and mouse embossed in black on grey cardstock. Cut into tag shape and backed with funky patterned paper and the bubble punch edge by Creative Memories (pink mounted over black).

The frog embossed in black on green cardstock. Cut with the Stampin Up scalloped nesting circles and laid over patterned papers with oversize flowers.

Posted in Uncategorized | Leave a comment

Stampin’ Up Florals

At a recent family gathering, we played with some of our new Stampin Up sets.  My sister received the Avant Garden and Artistically Asian.  I tried a coloring technique on these stamps, using Tim Holtz Distress Markers.  I colored the parts of the stamps in the shades I wanted, breathed on the stamp to add back moisture, then stamped the images.  It resulted in a watercolor look that I like. 
(Avant Garden) I used a Spellbinders nestabilities rectangle set to cut each of the stamped images and coordinating color mats.

(Artistically Asian) The floral images were accented with distress ink shaded onto the edges.

(Artistically Asian) The matted images were then mounted onto patterned papers from my stash.


(Artistically Asian) Finally, each image was accented with a large sticker. These were found at a local dollar store.  They are very nice, made from heavy cardstock.  Four more cards into the stack.

It’s nice to have a box full of completed cards. I had two friends who recently lost their husbands. I was able to pull out a nice card, add a sentiment and a note inside and get the card sent to them in a timely manner. Perhaps I should make cards in bulk every year.

Elizabeth


Posted in Uncategorized | Leave a comment

Laboratorie Stamps by Tim Holtz

Tim has designed so many wonderful stamps for Stamper’s Anonymous and I wish I could own them all.  But I was really excited to find this set – Laboratorie – a collection of vintage images of laboratory equipment.  My father is a retired forensic chemist who spent many years working for the FDA and the DEA.  I also have three sisters and a brother with science degrees – horticulture, genetics, aquatic engineering, and marine biology.  Science was always a big thing in our house growing up.

Making cards for men is hard, and when your dad is not into the usual guy stuff like sports, boats, cars and bbq, it’s even harder.  Therefore, locating science themed stamp sets is like finding a treasure.

Perfect for my father – a jar with a chemical reaction, test tubes in a stand and a chemistry table. The poison label washi tape, also by Tim Holtz, lends a nice touch, I think. I might add “DAD” along the top – not sure yet.

Not sure what this set up is – I did okay with science classes, but my brain is more wired towards the creative side.

A neat lab set up, with erlenmeyer flasks, ring stands, bunsen burners and glass tubing. Most of this equipment is still used today. I left space along the top for a quote, just haven’t decided what to use.  I think it will depend on who will receive this card.

Figure 64 I believe is a wash bottle, Figure 133 is a graduated beaker.  Steampunk gears always go with science type stuff, and I really like the rat washi tape.

Have a scientist in your life?  Or just like old laboratory stuff?  This set might be perfect for your stash.

Elizabeth

Posted in card creations | Tagged , , , | Leave a comment

Tim Holtz Seahorses

My sister had this really cool embossing folder with seashells around the edges. I embossed a piece of brown cardstock then went over it with a darker brown ink.  Wasn’t sure where to go next, until I remembered that I had the Tim Holtz Sizzix Bigz die – Sand & Sea. Find some paper and cut a seahorse.  Okay, good, only the first seahorse I cut was facing the wrong way. Not a problem, I had also had some Stampin’ Up shells stamped and cut out.  They were placed over some sand colored paper and the seahorse added on top.

Now let’s cut another seahorse, this time the right way round, and cut a sand dollar as well. These were placed onto the embossed background and some brads were added for bubbles.

Later, I pulled out my Stampers Anonymous Tim Holtz Nautical Blueprint stamps. I chose the seahorse and the shell this time. After coloring, the seahorse was trimmed and placed over cardstock embossed with a Spellbinders folder and some sand and bubble paper scraps.

The shell was colored as well and placed on paper embossed with a Spellbinders folder as well. I used a piece of mottled blue paper for an accent.  The blueprint stamps are large and detailed, so I don’t feel the need to go overboard on the accents.

Tune in again next time to see what I did with Tim’s Laboratorie stamp set.

Elizabeth

Posted in card creations | Tagged , , , , | Leave a comment

Making Cards in Bulk

So, sometime this year, we will be packing up our house in Arlington, VA (pop about 225,000) and moving to the small town of Forest Home, AL (pop about 1,000). That means I will not have access to my supplies, maybe for quite some time.  So, I decided to create a year’s worth of cards (mostly birthday) while I still had all my stuff available.

Yep, that’s a lot of cards. More than 50 completed.  Most of the time I make cards, I chose the stamps/papers based on who will be receiving the card.  I did some of that, but this time I also chose stamps or stamp sets to play with. I’ll show you some of my favorites over the next few posts.

First up, my sister Susan from OohLookItsaRabbit has the same affliction I have. We are always trying new crafts and techniques.  Last fall, she decided to try hand-carving stamps.  Here are three cards using stamps she made:

A Valentine’s Day card for my husband, who is a bee keeper.

My mom, who likes skunks, will get this for Mother’s Day.

My favorite bird, the flamingo, is double stamped onto this card.

I think Susan did an excellent job on the stamps.  I don’t think she’s selling them yet, but maybe she will in the future.  In the meantime, I have some great additions to my stamp stash.

Elizabeth

Posted in card creations | Tagged , , | 1 Comment

My Take on Tart Tin Ornaments

Metal tart tins are very popular for upcycled Christmas ornament crafts.  I’ve looked at many online and in magazines and knew I had a stack of tins in my studio.  Here’s my take on the tart tin ornament – I used vintage scenic Christmas cards, resin, mini tinsel garland, paper clay, Snow-Tex, glitter, and little bottle brush trees. I made a bunch of these for my annual ornament gift to the women in my Bible study.


Each tart tin is just under 4″ in diameter and about 1 1/4″ deep. I cut the images from vintage Christmas cards, and coated them with several layers of paper sealer. I then glued them into the bottom of the tin and poured a layer of Ice Resin on top.

When the resin was cured, I glued mini tinsel garland around the image to block any gaps that showed. I then took paper clay and shaped it in the front bottom of the tin to make a mound of “snow”.

When the paper clay had dried, I covered it with a layer of Deco-Art’s Snow-Tex dimensional snow product. I quickly poured on some fine glitter, tapped off the excess, then set aside to dry.
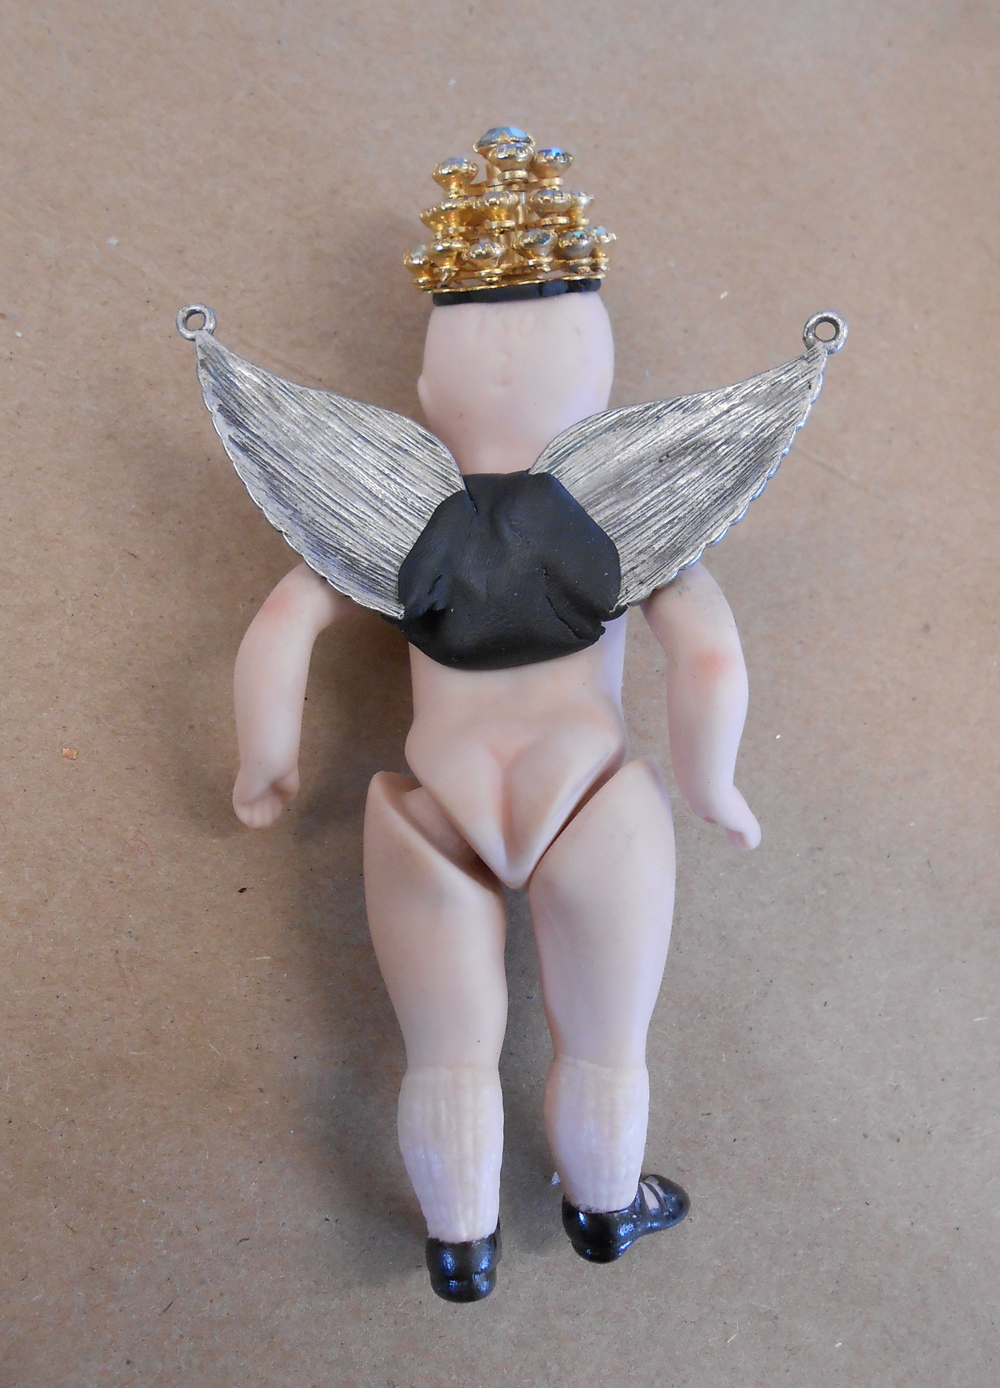
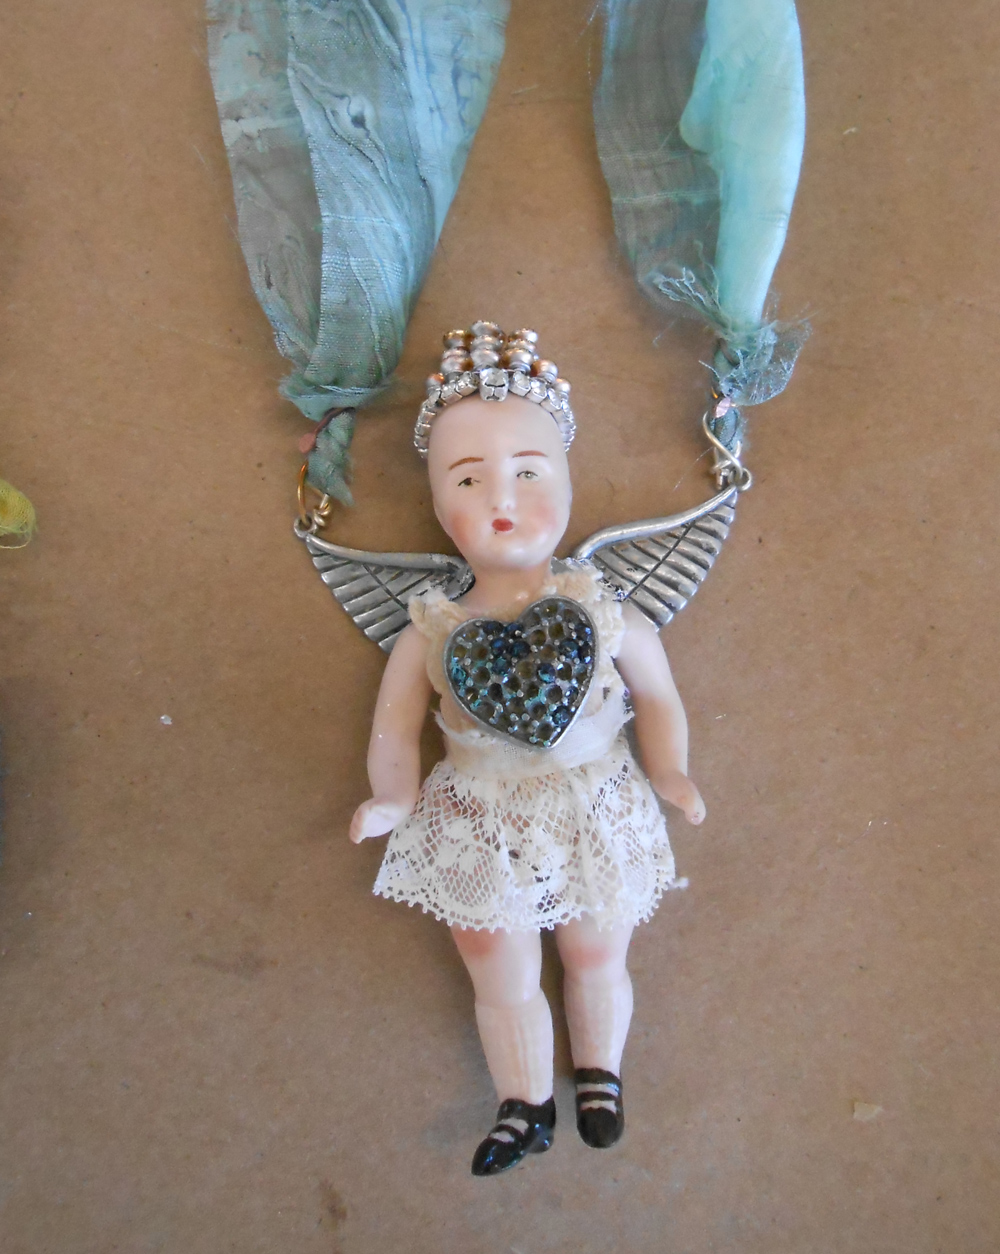
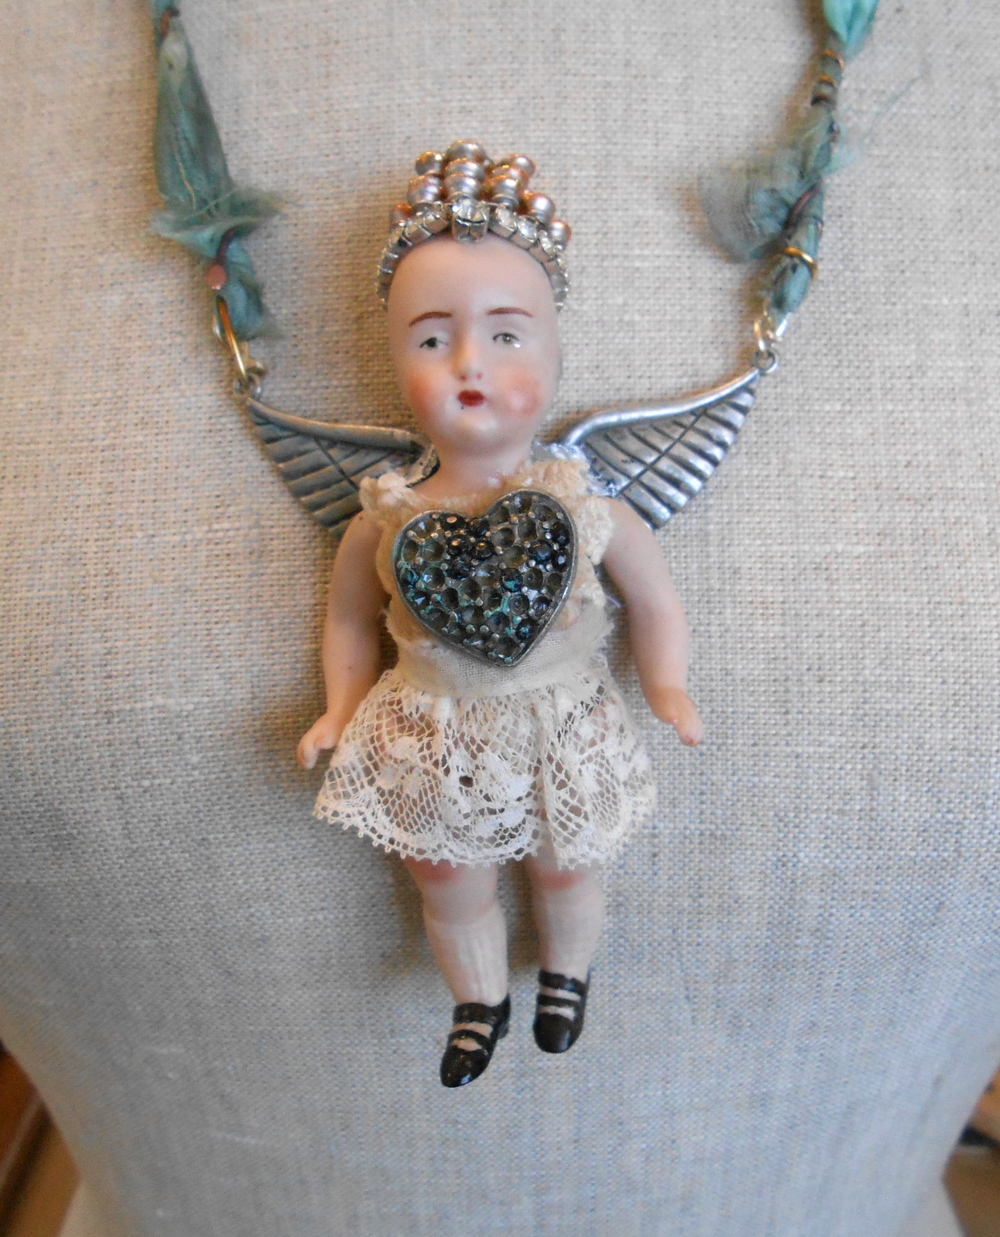
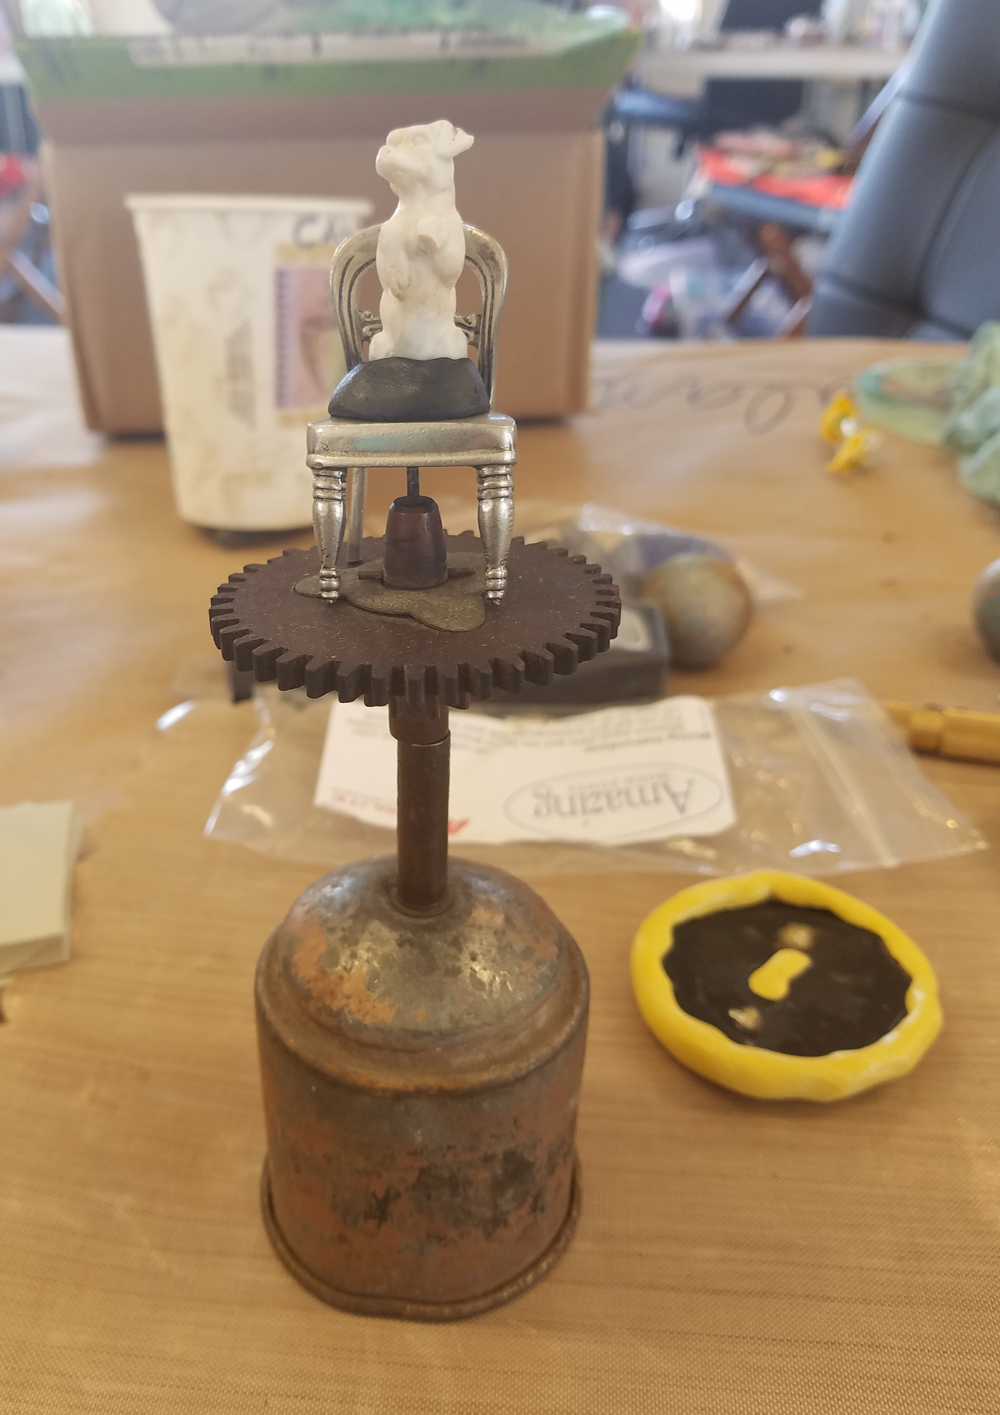
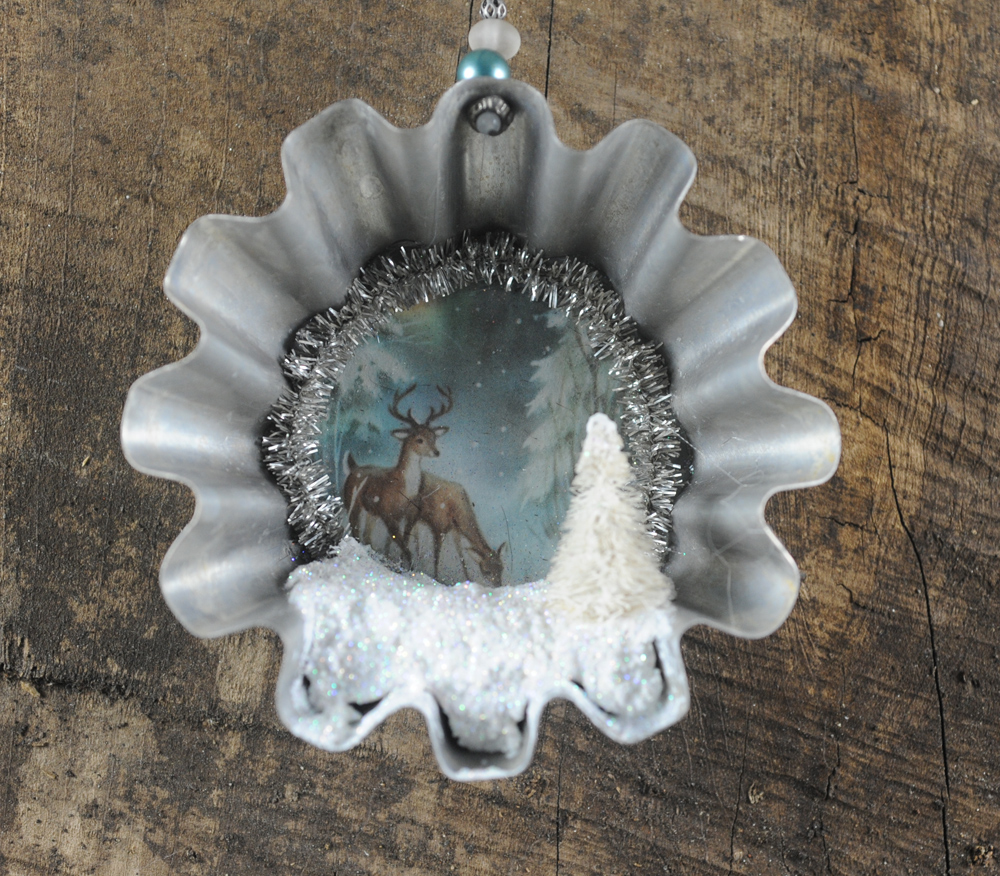
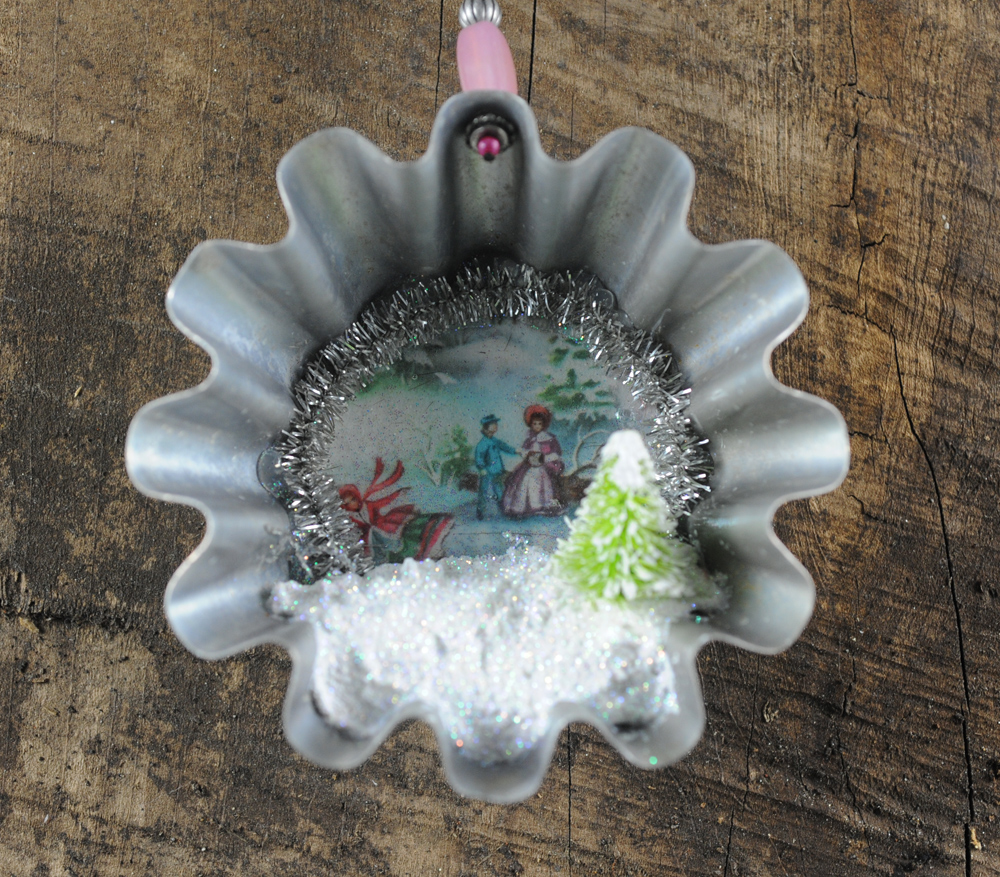
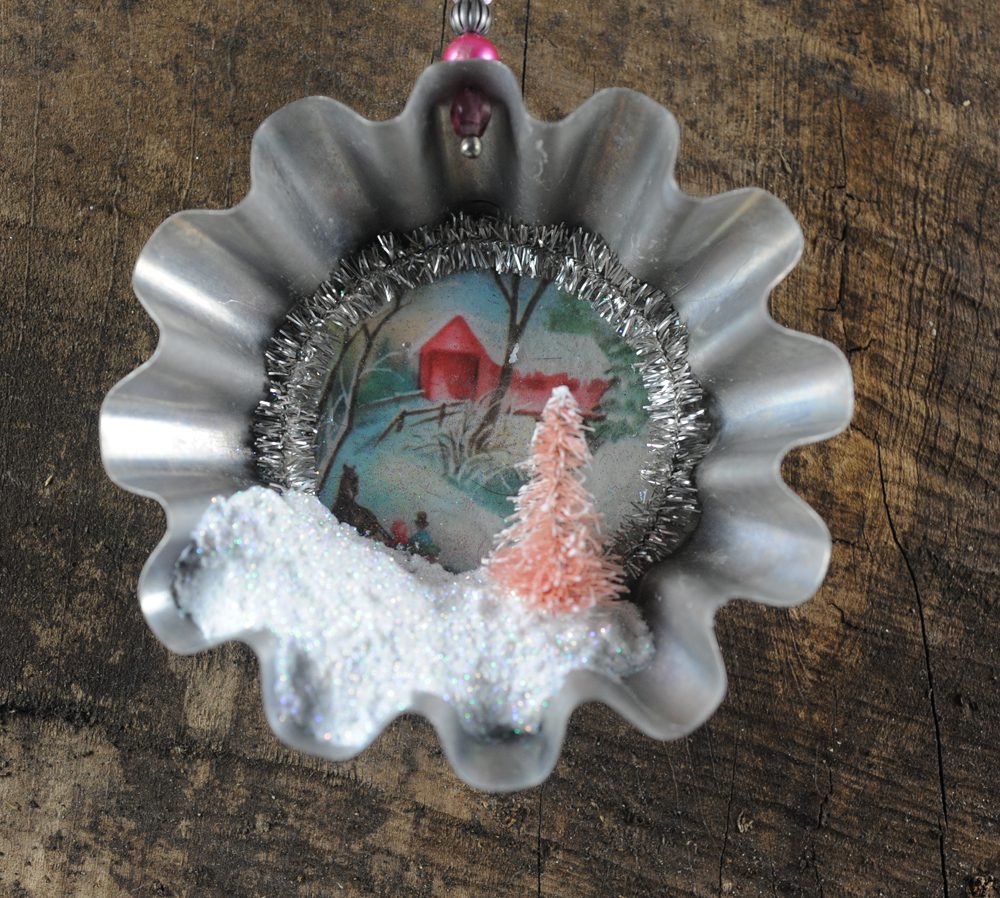
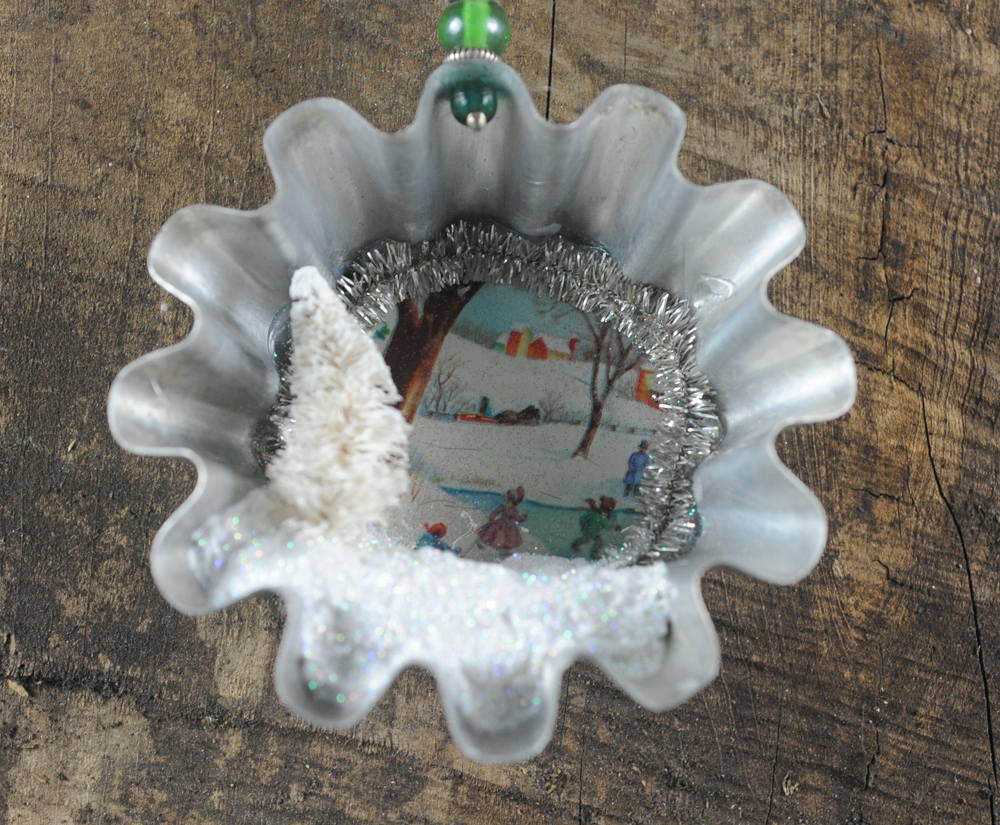
Next I  glued in a tiny bottle brush tree. I removed these from their bases and poked a hole into the clay with an awl. To hang the ornaments, I used a metal hole punch to pierce the top, then threaded some beads onto a head pin and finished it with a wrapped loop. A small piece of silver cord tied onto the loop finishes it off.

I hope you enjoy seeing my take on this project. Here’s wishing you and yours a Merry Christmas and a Happy New Year!
Elizabeth

Posted in christmas, ice resin, recycled creations | Tagged , , , , , | Leave a comment